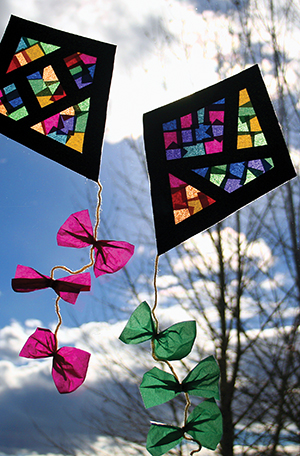
Materials:
Strips of black construction paper, about ½-inch wide
Scrap pieces of black construction paper (use the extra from cutting out the kites)
Colored tissue paper (cut or rip it into squares; they don’t need to be perfect)
Clear contact paper
Yarn or ribbon
How to Make:
Place a piece of clear contact paper, sticky side up, on the desk. You may want to tape it down to keep it in place.
Stick your kite frame down on the contact paper then create sections with the black paper strips.
Next, cover your kite with your colored tissue paper pieces; it’s OK if they overlap the outside border of your kite.
When your kite is completely covered with tissue paper, place another piece of clear contact paper over it to seal it. To avoid wrinkles and air pockets, begin at one end and slowly smooth it down over the kite.
Now it is time to cut out your kite shape, trimming away any extra paper strips, tissue paper, and contact paper. For the tail, staple a piece of ribbon or yarn to the bottom of the kite.
For a finishing touch, you can add a few construction paper or tissue paper flags to the tail. Simply cut out a bow tie shape and staple it to the tail.
Finally, tape the kites on the classroom window for a colorful display that will make everyone smile!
